 unixwerk
Setting up a Wireless Network with Slackware 12
This article describes how to setup an wireless network under Slackware 12.1, 12.2, or 13.0. Special attention is paid to RaLink RT2500 based chipsets.
Contents
- Pre 2.6.28 Kernels
- Kernel 2.6.29 and higher
- Unencrypted Connection
- Encrypted Connection
- MAC Address Filter
- The RutilT GUI
1. Pre 2.6.28 Kernels
1a. Kernel Configuration
Check your kernel configuration for WLAN support
tux:/usr/src/linux# make menuconfig
Network device support  --->
  Wireless LAN  --->
    | |[ ] Wireless LAN (pre-802.11)                               | |
    | |[*] Wireless LAN (IEEE 802.11)                              | |
If not, you have to enable it and recompile the kernel. More is not needed - the device driver for RT cards we get separately:
1b. Device Driver Installation
The kernel module for RT2x00 chipsets can be found at rt2x00.serialmonkey.com:
darkstar# wget http://rt2x00.serialmonkey.com/rt2500-cvs-daily.tar.gz
It has to be unpacked and compiled:
 darkstar# tar xvzf rt2500-cvs-daily.tar.gz
 darkstar# cd rt2500-cvs-$(date +%Y%m%d)*/Module
 darkstar# make
 darkstar# make install
Now everything should be in place and the module can be loaded into the kernel:
 darkstar# modprobe ra0
 darkstar# ifconfig ra0 up
2. Kernel 2.6.29 and higher
Since version 2.6.29 of the Linux kernel the legacy driver is not supported anymore. If you try to compile the module you end up with an error. This doesn't mean that you cannot use your wireless network anymore - the driver is now part of the official kernel tree.
2a. Kernel Configuration
If you don't see the "Ralink driver support" close to the end of the page, check for the following settings:
These settings are required in order to get the Ralink support. If they are disabled menuconfig does not offer the Ralink menues.
The module is called rt2500pci. The interface is now called wlan0 instead of ra0 as it was with the legacy driver. Don't forget to replace ra0 with wlan0 in the commands below if you use the new driver!
We recompile the kernel as always
copy arch/i386/boot/bzImage to /boot and adapt /etc/lilo.conf to point to the new kernel, rerun lilo and boot up the new kernel. After the system comes back the new module should already be visible - all we have to do is to bring the interface up:
tux:/usr/src/linux# make menuconfig
Network device support  --->
  Network device support  --->
    Wireless LAN  --->
      | |[ ] Wireless LAN (pre-802.11)                               | |
      | |[*] Wireless LAN (IEEE 802.11)                              | |
           :
           :
      | |<*> Ralink driver support  --->
             | | < >   Ralink rt2400 (PCI/PCMCIA) support            | |
             | | <M>   Ralink rt2500 (PCI/PCMCIA) support            | |
             | | < >   Ralink rt2501/rt61 (PCI/PCMCIA) support       | |
             | | < >   Ralink rt2500 (USB) support                   | |
             | | < >   Ralink rt2501/rt73 (USB) support              | |
             | | [ ]   Ralink debug output                           | |
Networking support  --->
  Wireless  --->
    -*-   Improved wireless configuration API                        | |
    [ ]     cfg80211 regulatory debugging                            | |
    [*]   Old wireless static regulatory definitions                 | |
    -*-   Wireless extensions                                        | |
    [*]     Wireless extensions sysfs files                          | |
    {*}   Common routines for IEEE802.11 drivers                     | |
    [ ]   lib80211 debugging messages                                | |
    <*>   Generic IEEE 802.11 Networking Stack (mac80211)            | |
          Rate control algorithm selection  --->                     | |
    [ ]     Enable mac80211 mesh networking (pre-802.11s) support    | |
    [*]     Enable LED triggers                                      | |
    [ ]     Select mac80211 debugging features  --->                 | |
darkstar:/usr/src/linux# make && make modules_install
darkstar# ifconfig wlan0 up
3. Unencrypted Connection
First the default network route has to be removed:
darkstar# route delete default
Then we configure the wireless NIC using the iwconfig utility. Check your wireless router for ESSID and channel¹.
 darkstar# iwconfig ra0 essid linksys
 darkstar# iwconfig ra0 channel 11 ¹
 darkstar# iwconfig ra0
Finally we set the IP address with DHCP:
darkstar# dhcpcd ra0
dhcpd also sets the default gateway and the DNS servers to proper values.
4. Encrypted Connection
WEP and legacy WPA(1) encryptions don't add much security to your wireless setup. So this article only deals with WPA2 encryption. To enable WPA2 encryption on your router set
- Security mode to WPA2 Personal
- WPA Algorithm to TKIP+AES
- WPA Shared Key to a password of 8 to 64 characters
We need a couple of commands more than with an unencrypted connection. We use iwpriv for the encryption details. Again you need your router's ESSID and a channel¹.
 darkstar# ifconfig ra0 up
 darkstar# iwconfig ra0 mode managed
 darkstar# iwpriv ra0 set AuthMode=WPAPSK
 darkstar# iwpriv ra0 set EncrypType=TKIP
 darkstar# iwconfig ra0 essid linksys ²
 darkstar# iwpriv ra0 set WPAPSK="SECRET_PASSWORD" ²
 darkstar# iwconfig ra0 essid linksys
 darkstar# iwconfig ra0 channel 11 ¹
 darkstar# iwconfig ra0
and finally we get an IP address from the router via DHCP:
darkstar# dhcpcd ra0
5. MAC Address Filter
Most routers offer an option to limit access to special MAC addresses. To find the MAC address we can use ifconfig:
 darkstar# ifconfig ra0
 ra0       Link encap:Ethernet  HWaddr 77:4d:68:3a:aa
           UP BROADCAST RUNNING MULTICAST  MTU:1500  Metric:1
           RX packets:347 errors:0 dropped:0 overruns:0 frame:0
           TX packets:801 errors:54 dropped:54 overruns:0 carrier:0
           collisions:224 txqueuelen:1000
           RX bytes:132904 (129.7 KiB)  TX bytes:23539 (22.9 KiB)
           Interrupt:16 Base address:0xc000
In the above output we find a MAC address of 77:4d:68:3a:aa
6. The RutilT GUI
There is also a graphical utility available for configuring wireless networks with RT based cards. It can be downloaded from bonrom.cbbknet.com. It has to be compiled from the source:
 darkstar# tar xvzf RutilTv0.18.tar.gz
 darkstar# cd RutilTv0.18
 darkstar# ./configure.sh
 darkstar# make
 darkstar# make install
The utility can be started by typing
rutilt&
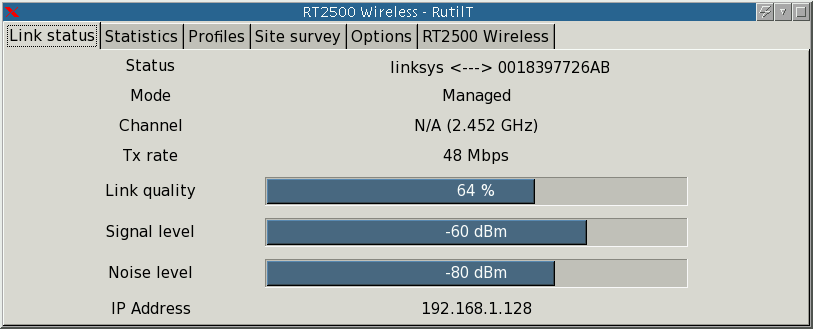
at the command prompt. It looks and works very much like the Windows tool you get with some laptops. It provides you with a list of networks. You can click on one and it tries to connect to it. dhclient ist used as a backend.
The picture shows the main tab after a successful connection to a wireless network.
A. Related Information